
30 Days of Vue
Vue Components - Global Components
This post is part of the series 30 Days of Vue.
In this series, we're starting from the very basics and walk through everything you need to know to get started with Vue. If you've ever wanted to learn Vue, this is the place to start!

Vue Components - Global Components
In today's session, we'll be building our first global Vue component.
In the last week and a half, we’ve covered a large number of properties and features within a Vue instance. We’ve discussed an instance’s reactivity, its directives, methods, computed properties, watchers, and lifecycle hooks. For those who might have used other newer front end libraries/frameworks, you may have noticed we haven’t discussed a vital piece of modern UI development - components.
Components
Vue provides the ability for us to create isolated components within an application. Reusability and maintainability are some of the main reasons as to why building an application with well-structured components are especially important.
Vue components are intended to be self-contained modules since we can group markup (HTML), logic (JS), and even styles (CSS) within them. This allows for easier maintenance, especially when applications grow much larger in scale.
An important note to keep in mind is that Vue components are Vue instances. This means almost all the properties we’ve seen thus far (except for a few root-level options) in a root instance are applicable to components as well. In fact, the Vue documentation states that “[Vue] components are reusable Vue instances with a name…”.
To get a better understanding of components, we’ll go ahead and create one.
Simple Twitter App
By the end of tomorrow's article, we’ll look to have created a mock Twitter application that displays a list of tweets from a data source.
The data source will be available to us on the client-side and passed into the data property of the application instance:
const tweets = [
  {
    id: 1,
    name: 'James',
    handle: '@jokerjames',
    img: './images/james.png',
    tweet: "If you don't succeed, dust yourself off...",
    likes: 10,
  },
  {
    id: 2,
    name: 'Fatima',
    handle: '@fantasticfatima',
    img: './images/fatima.png',
    tweet: 'Better late than never but never late...',
    likes: 12,
  },
  {
    id: 3,
    name: 'Xin',
    handle: '@xeroxin',
    img: './images/xin.png',
    tweet: 'Beauty in the struggle...',
    likes: 18,
  }
];

new Vue({
  el: '#app',
  data: {
    tweets
  }
});
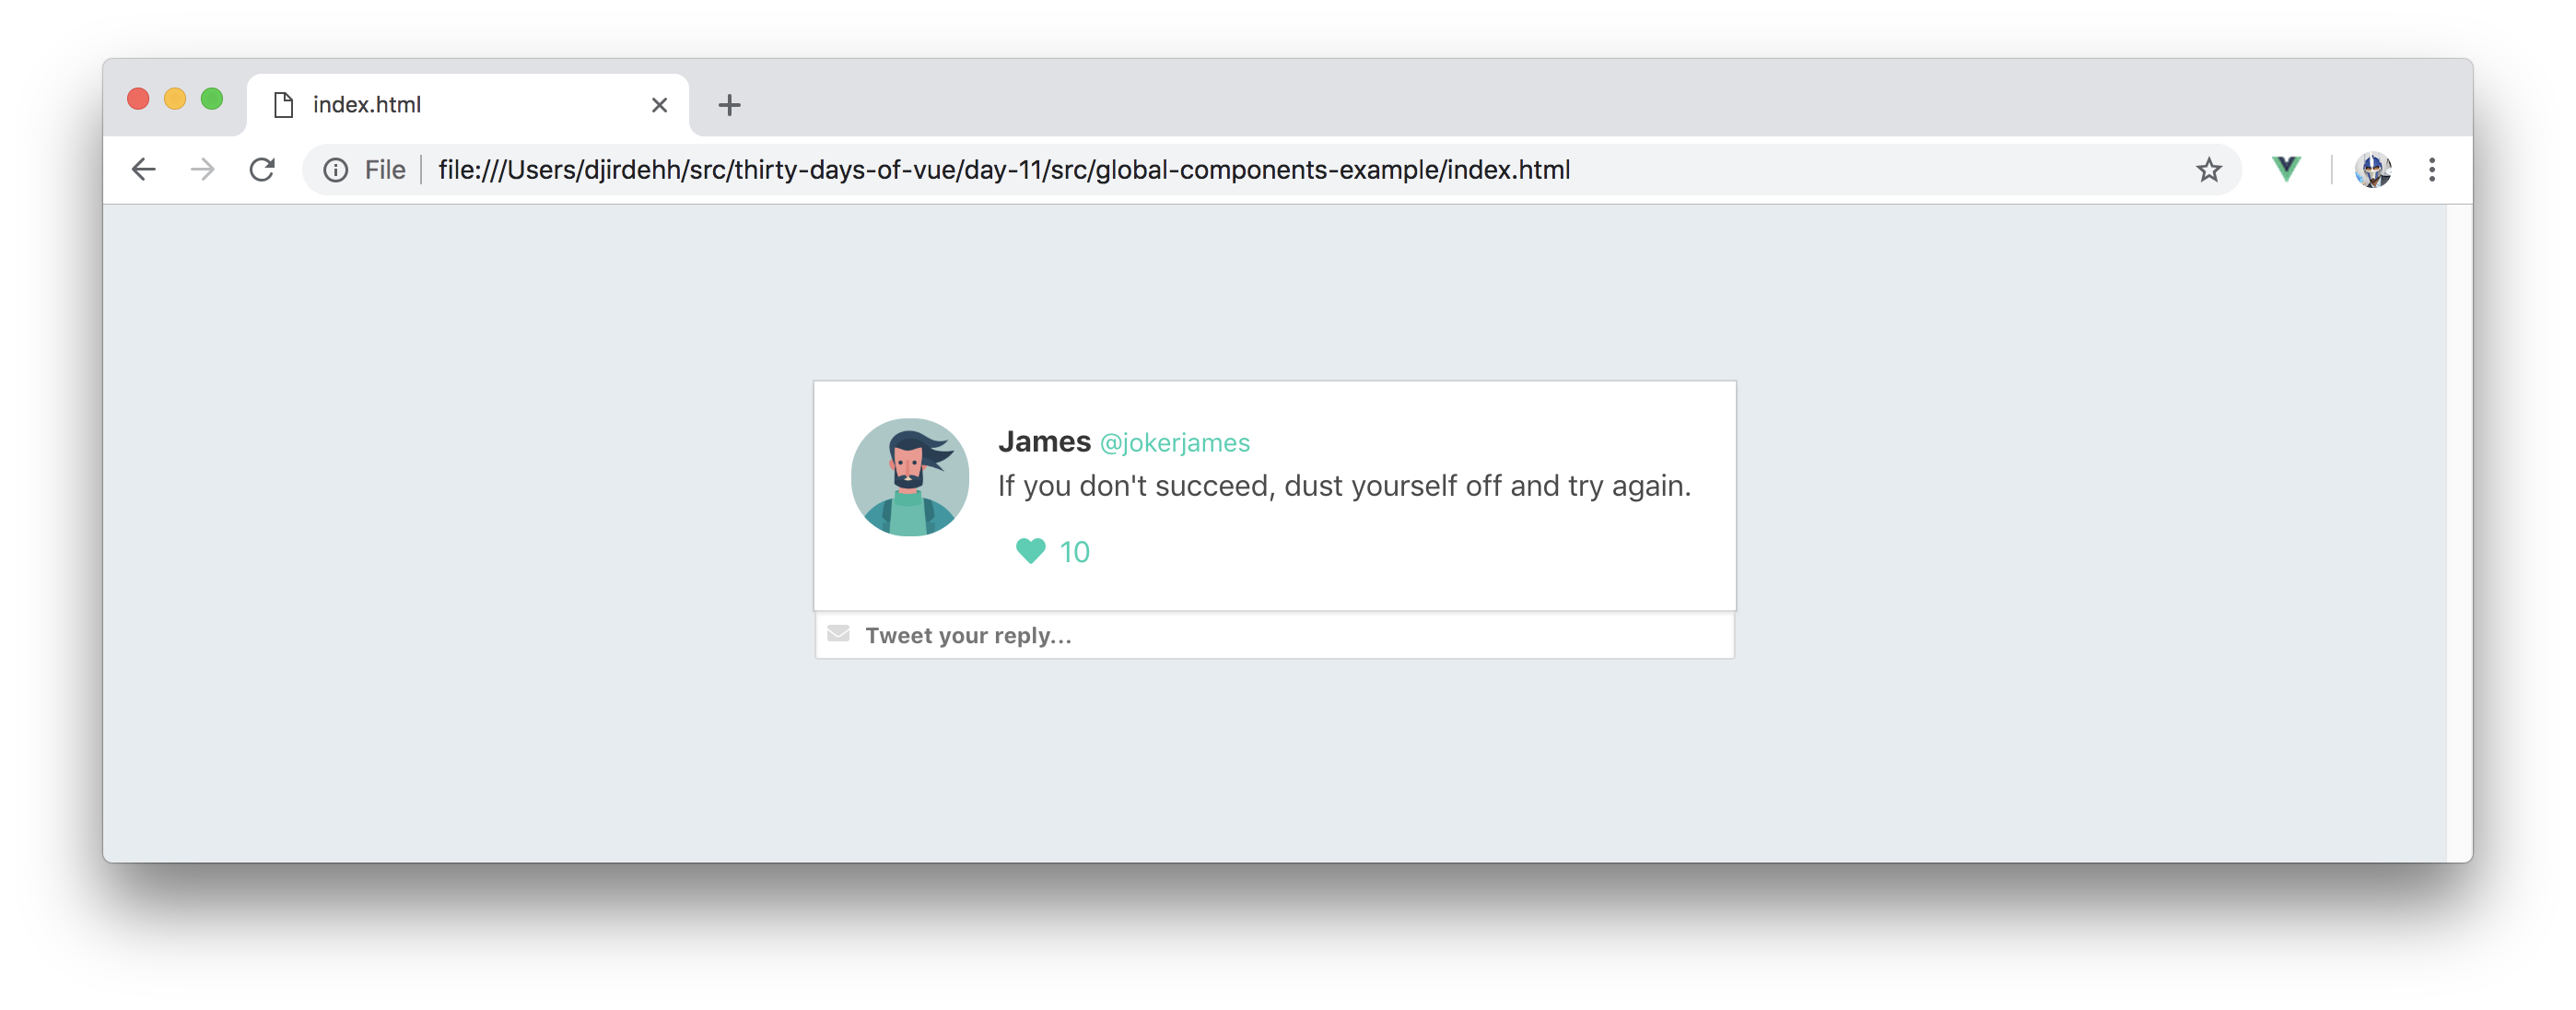
By binding the information of just the first tweet object on to the template, our HTML will look something like the following:
<html>
  <head>
    <link rel="stylesheet" href="./styles.css" />
    <link rel="stylesheet"
      href="https://unpkg.com/bulma/css/bulma.css" />
    <link rel="stylesheet"
      href="
        https://use.fontawesome.com/releases/v5.6.1/css/all.css
      " />
  </head>

  <body>
    <div id="app">
      <div class="tweet">
        <div class="box">
          <article class="media">
            <div class="media-left">
              <figure class="image is-64x64">
                <img :src="tweets[0].img">
              </figure>
            </div>
            <div class="media-content">
              <div class="content">
                <p>
                  <strong>{{tweets[0].name}}</strong>
                  <small>{{tweets[0].handle}}</small>
                  <br>
                  {{tweets[0].tweet}}
                </p>
              </div>
              <div class="level-left">
                <a class="level-item">
                  <span class="icon is-small">
                    <i class="fas fa-heart"></i>
                  </span>
                  <span class="likes">
                    {{tweets[0].likes}}
                  </span>
                </a>
              </div>
            </div>
          </article>
        </div>
        <div class="control has-icons-left">
          <input class="input is-small"
            placeholder="Tweet your reply..." />
          <span class="icon is-small is-left">
            <i class="fas fa-envelope"></i>
          </span>
        </div>
      </div>
    </div>
    <script src="https://unpkg.com/vue"></script>
    <script src="./main.js"></script>
  </body>
</html>
We've introduced the Font Awesome library for icons and are referencing images that are kept within the
imagesfolder of our project.
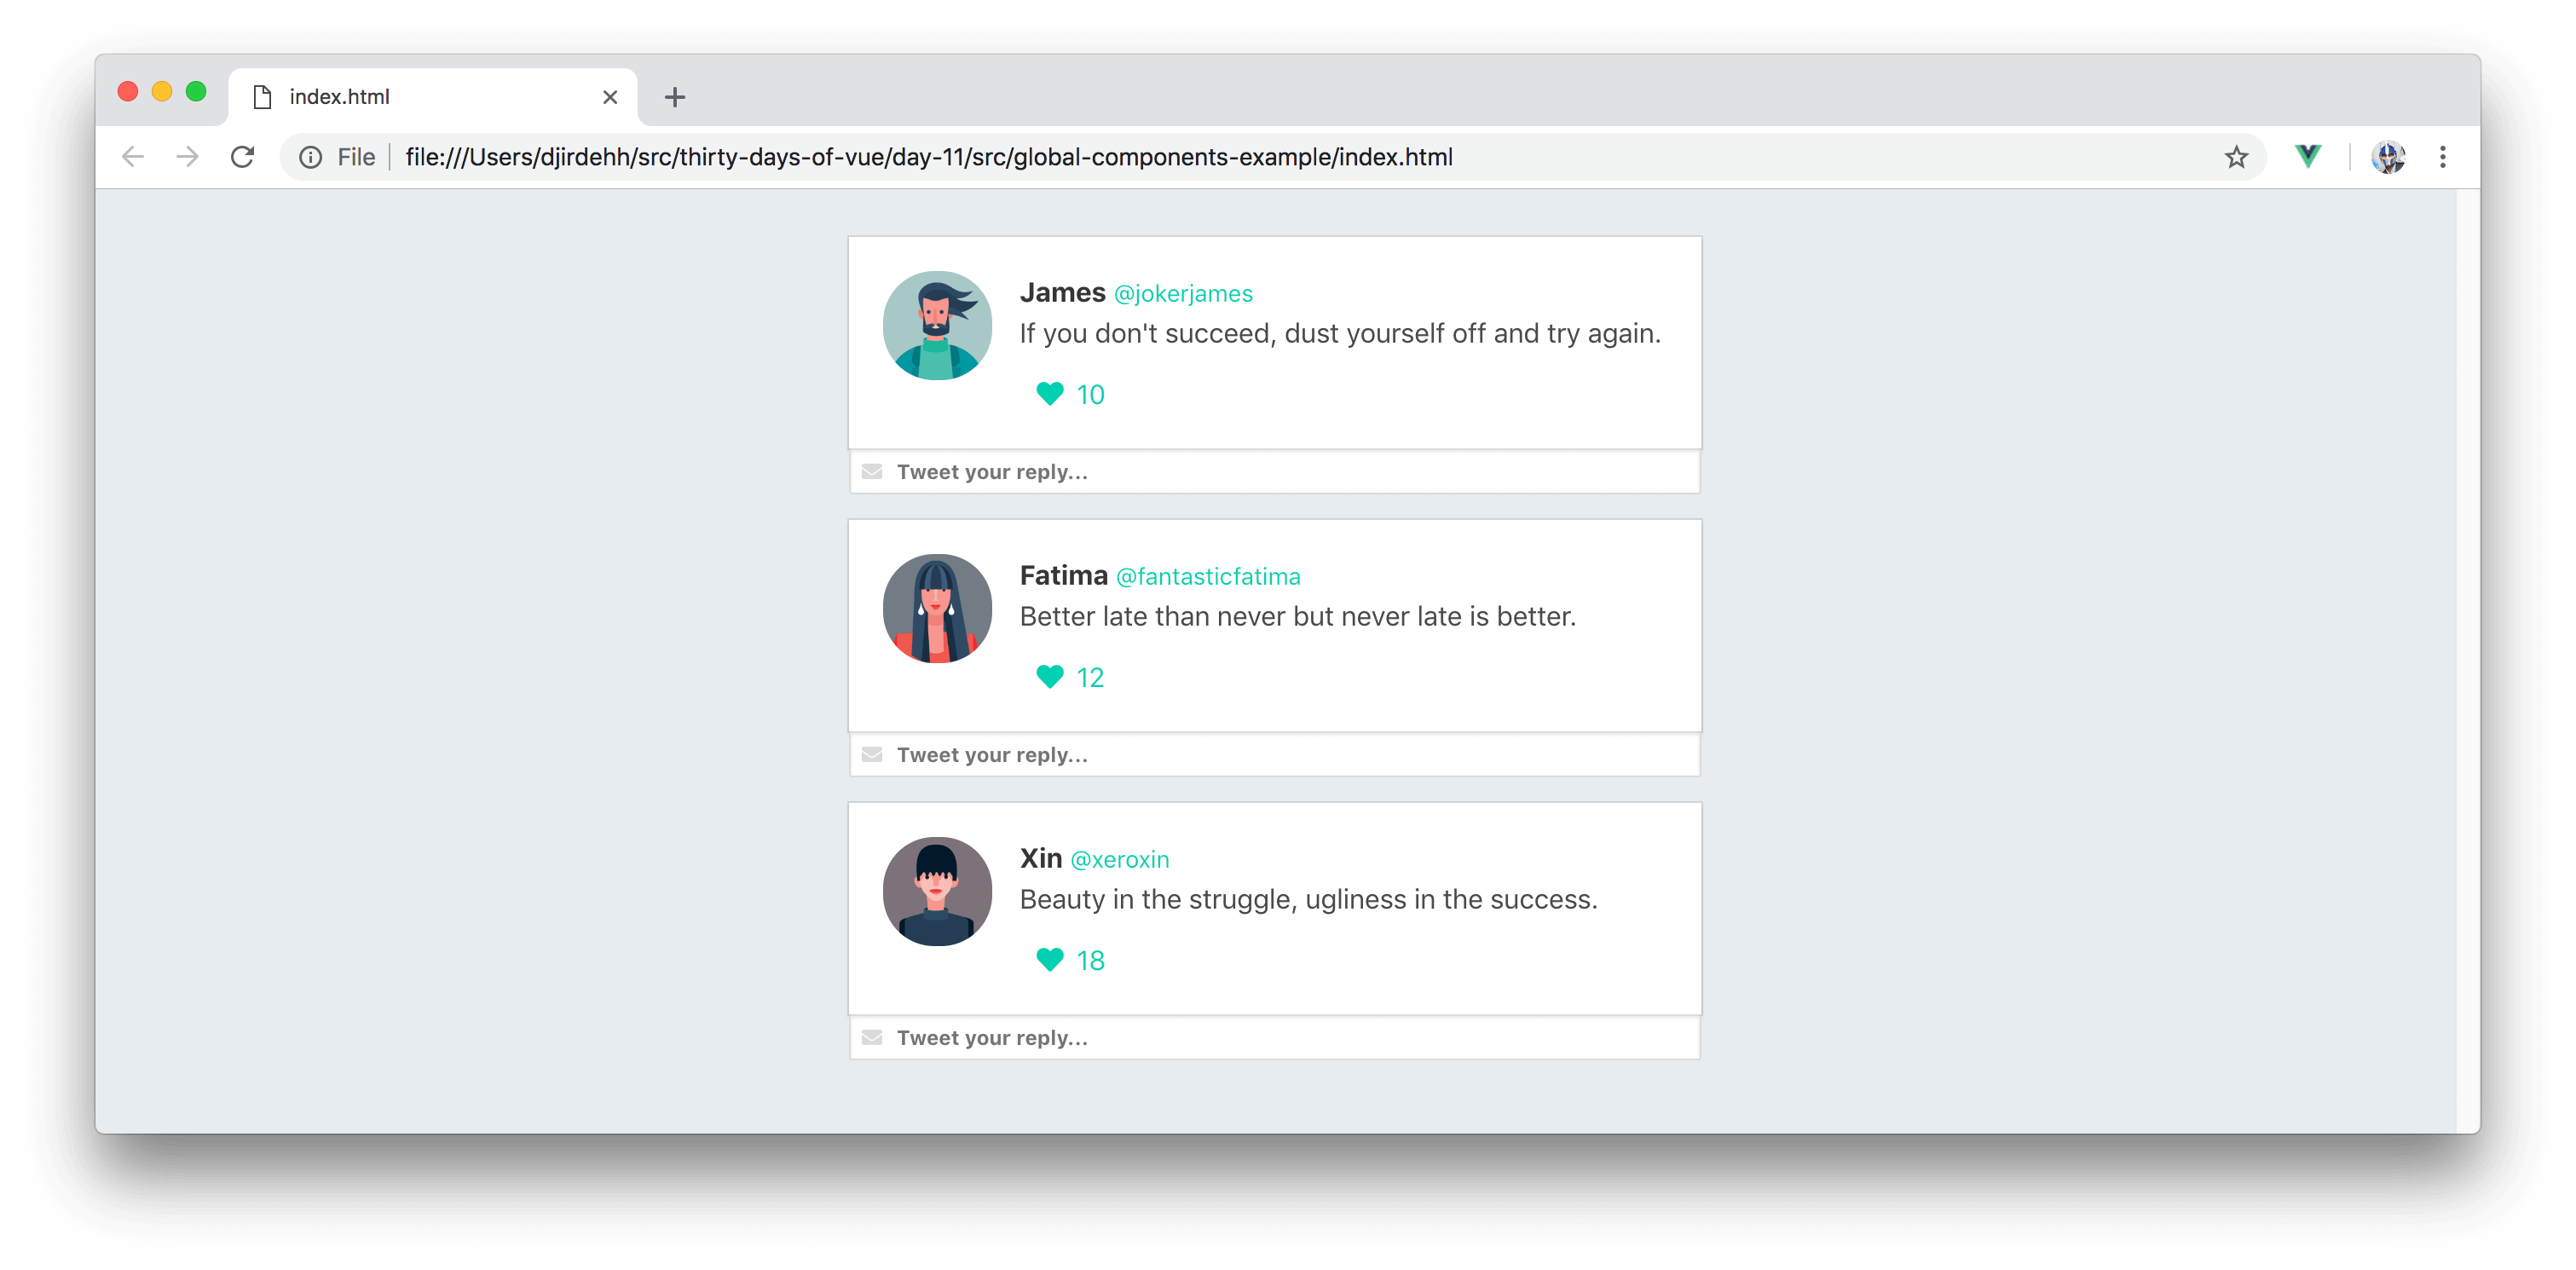
With the appropriate styles already prepared for us, our application will now look like this:
Our aim is to show a tweet element for every single tweet object available in our data. Since we’ll be rendering a list of elements, the best way to achieve this is with the help of the v-for directive:
<html>
  <head>
    <link rel="stylesheet" href="./styles.css" />
    <link rel="stylesheet"
      href="https://unpkg.com/bulma/css/bulma.css" />
    <link rel="stylesheet"
      href="
        https://use.fontawesome.com/releases/v5.6.1/css/all.css
      " />
  </head>

  <body>
    <div id="app">
      <div class="tweet"
        v-for="tweet in tweets"
        :key="tweet.id">
        <div class="box">
          <article class="media">
            <div class="media-left">
              <figure class="image is-64x64">
                <img :src="tweet.img">
              </figure>
            </div>
            <div class="media-content">
              <div class="content">
                <p>
                  <strong>{{tweet.name}}</strong>
                  <small>{{tweet.handle}}</small>
                  <br>
                  {{tweet.tweet}}
                </p>
              </div>
              <div class="level-left">
                <a class="level-item">
                  <span class="icon is-small">
                    <i class="fas fa-heart"></i>
                  </span>
                  <span class="likes">
                    {{tweet.likes}}
                  </span>
                </a>
              </div>
            </div>
          </article>
        </div>
        <div class="control has-icons-left">
          <input class="input is-small"
            placeholder="Tweet your reply..." />
          <span class="icon is-small is-left">
            <i class="fas fa-envelope"></i>
          </span>
        </div>
      </div>
    </div>
    <script src="https://unpkg.com/vue"></script>
    <script src="./main.js"></script>
  </body>
</html>
In the template above, we’re binding the contents of the iterated tweet object onto our template. This renders a list of tweet elements with each element containing details of a single tweet object:
Global Components
If we take a look at the UI we've set up, we can distinctively point out the pieces of our application that could be made to be self contained modules of their own.
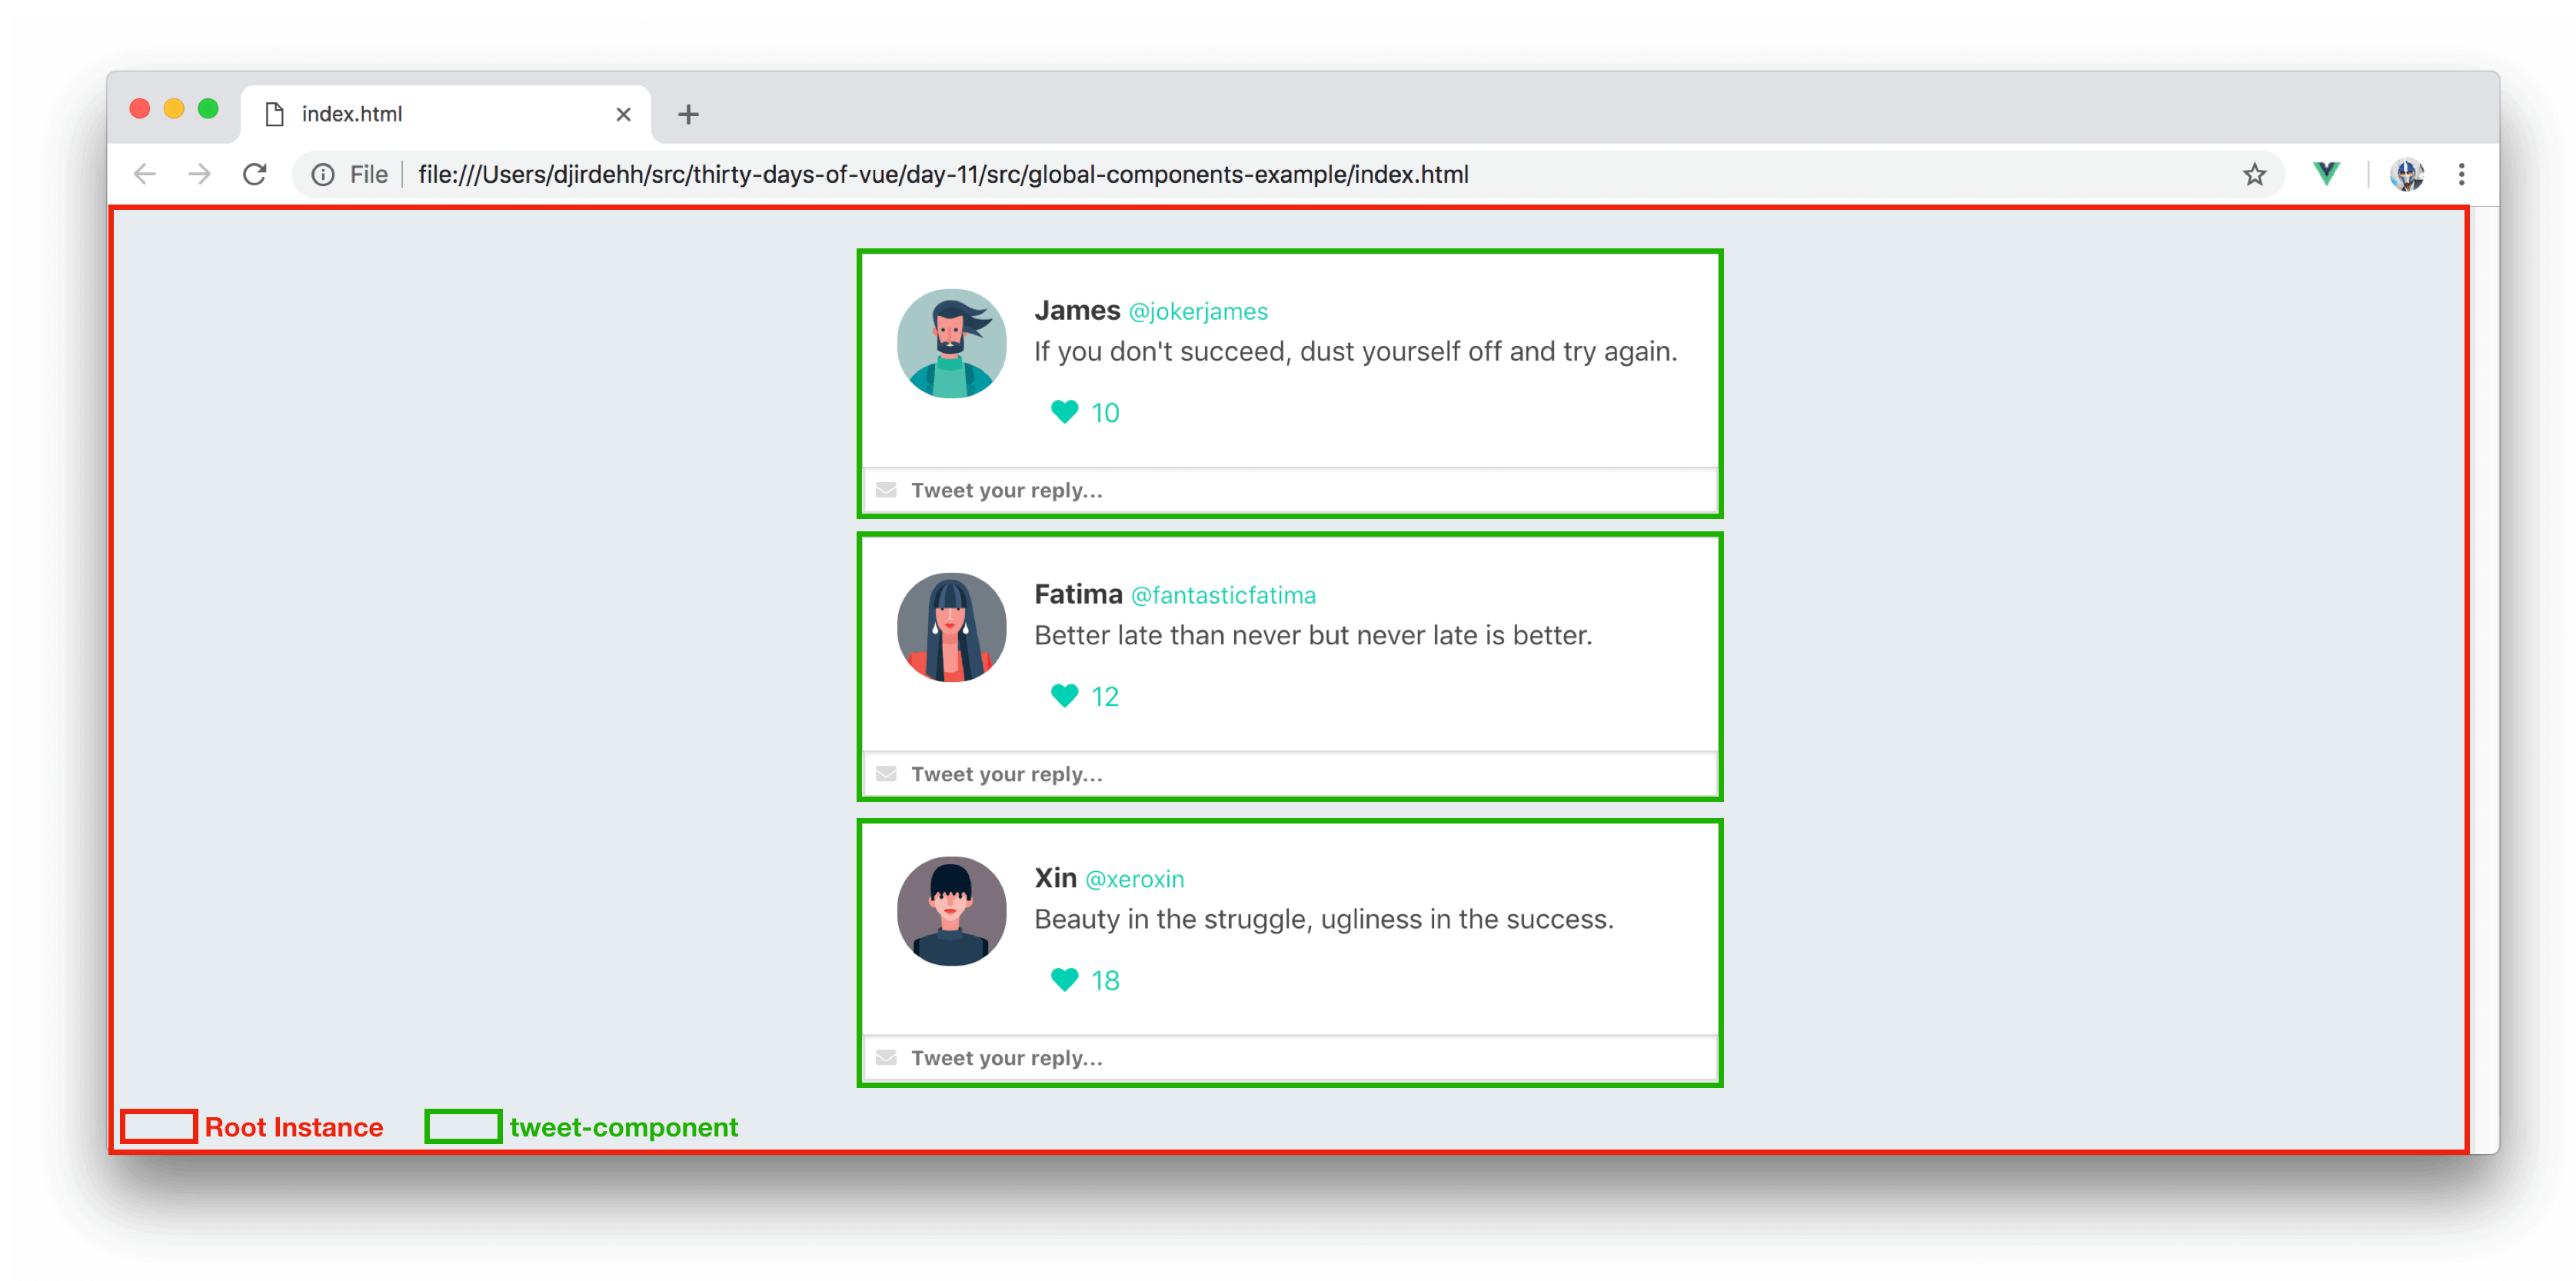
The Root Instance resembles the entire root instance of our application while tweet-component could be the instance that isolates the markup responsible for a single tweet element.
Let's go ahead and create this tweet-component. The simplest method for creating a component is using the Vue.component() constructor.
Vue.component('tweet-component', {
  // options
});
The Vue.component() constructor registers a component globally in an application. In the constructor above, the first argument we've passed in is the name (i.e. the identifier) of the component - tweet-component. In the second argument, we've passed in an empty options object that will contain the definition of the component such as its data, methods, etc.
Though there are a few different ways to declare the template of a component, the standard way of doing so is using the template option which expects a string value.
We haven’t found the need to use the template option in our root instance since we were able to use the root-level option, el, to declare the view our instance will depend upon.
To get things started, we’ll create a tweet-component with hard-coded data. We’ll specify the template of the component to simply be the markup associated with <div class="tweet">...</div>. We'll create this component right before the instantiation of our root instance.
Vue.component('tweet-component', {
  template: `
    <div class="tweet">
      <div class="box">
        <article class="media">
          <div class="media-left">
            <figure class="image is-64x64">
              <img src="./images/james.png">
            </figure>
          </div>
          <div class="media-content">
            <div class="content">
              <p>
                <strong>James</strong>
                <small>@jokerjames</small>
                <br>
                If you don't succeed, dust yourself off...
              </p>
            </div>
            <div class="level-left">
              <a class="level-item">
                <span class="icon is-small">
                  <i class="fas fa-heart"></i>
                </span>
                <span class="likes">
                  10
                </span>
              </a>
            </div>
          </div>
        </article>
      </div>
      <div class="control has-icons-left">
        <input class="input is-small"
          placeholder="Tweet your reply..." />
        <span class="icon is-small is-left">
          <i class="fas fa-envelope"></i>
        </span>
      </div>
    </div>
  `
});
We’ve declared the template of the component within backticks (i.e. ES6 template literals) to be able to neatly arrange the markup in multi-line format.
Template literals are an unsupported feature for older browsers like IE11.
With the component created, we’ll now be able to render the component in the root template. We’ll want the component to be rendered for every tweet in the tweets array. Since we want to render a list of tweet-component's, we'll declare the v-for directive where the component is being rendered. Removing the old template code and rendering a list of tweet-component's would have our root template be updated to the following:
<html>
  <head>
    <link rel="stylesheet" href="./styles.css" />
    <link rel="stylesheet"
      href="https://unpkg.com/bulma/css/bulma.css" />
    <link rel="stylesheet"
      href="
        https://use.fontawesome.com/releases/v5.6.1/css/all.css
      " />
  </head>

  <body>
    <div id="app">
      <tweet-component
        v-for="tweet in tweets" :key="tweet.id">
      </tweet-component>
    </div>
    <script src="https://unpkg.com/vue"></script>
    <script src="./main.js"></script>
  </body>
</html>
At this moment, our application would look like the following:
Live version - https://30dofv-globalcomponents.surge.sh
Notice how the root template is a lot easier to read now? This is in part due to using components to encapsulate relevant content within themselves. This is a very simple application, but for larger apps - the importance of well structured and named components can’t be stressed enough.
Though we’re rendering a list of components, the application isn’t where we want it to be since each component is rendering the same static information. What we intend to do is have the template of every tweet-component render the details of a single unique tweet object from the tweets array.
The tweets data array is part of the root instance and tweet-component is generally unaware of its existence. Since tweet-component is rendered as a child of the root instance, we can use something known as props to pass the relevant data down to the component.
This is where we'll be picking up tomorrow. In the next article, we’ll spend a little time discussing what props are before updating our app to use props to have our components contain the data they need.
The entire source code for this tutorial series can be found in the GitHub repo, which includes all the styles and code samples.
If at any point you feel stuck, have further questions, feel free to reach out to us by:
- Creating an issue at the Github repo.
- Tweeting at us at @fullstackio.
Course Author

Get started now
Join us on our 30-day journey in Vue. Join thousands of other professional Vue developers and learn one of the most powerful web application development frameworks available today.